Thermal Printing
The Problem: Thermal printers don't use PostScript and therefore need a special set of instructions sent to them via raw text. Web browsers don't support this for security reasons and because most users use PostScript compatible printers.
The Solution: Use the RocketShipIt Print Server which comes with your RocketShipIt subscription!
RocketShipIt Print Server
RocketShipIt Print Server is a web server typically ran on the machine that is hooked up to the printer; although, it can also print to a remote printer.
You will then send a base64 label
to this server via HTTP POST which will then send the decoded base64 label
directly to the thermal printer.
This server requires no installation and can be run anywhere.
RocketShipIt Print Server is cross compatible and tested on Windows, Linux,
Mac, and ARM (Raspberry Pi).
Several advantages include:
- Ability to automatically print without user interaction (no clicking of a print button) and set up queues.
- If configured it can be called from remote computers or across the internet via HTTPS
- Ability to have multiple shipping stations configured and distribute load across workstations.
Notable Features
- Cross Compatible (Windows, Mac, Linux, and ARM (Raspberry Pi)
- Heat beat sensor, periodically pings a URL of your choice indicating live printers available from pool.
- Posts print and other valuable data back to a URL of your choice, useful for monitoring all printers from a central location
Setup
There is no setup!
Simply download the RocketShipIt print server from the RocketShipIt My Account page and execute it. After the server starts, your default browser should open to the welcome page.
Configuation
The RocketShipIt Print Server will detect all available printers. You can switch printers from the web interface by clicking the dropdown and selecting the thermal printer you wish to send labels to.
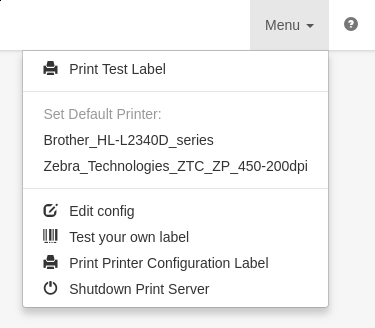
Then press Print Test Label to print a sample label.
Please note that this test label is in EPL format which should work for most printers but not all. This test print usually works but if it doesn't, don't worry. It might mean that your printer needs ZPL or another format which you can send via HTTP POST or by clicking Test your own label.
Sending Labels
To send labels to the RocketShipIt Print Server simply do a application/x-www-form-urlencoded HTTP post to the print server url (default is http://localhost:8080).
The easiest way to do this which also works from over the internet is to create a PHP page on your webserver and output a form on a page like this:
    <form method="post" action="http://localhost:8080">
        <input type="hidden" name="label" value="<?php echo $base64Label; ?>" />
        <input type="submit" value="Print" />
    </form>
Then navigate to this page from the computer hooked up to the printer with the RocketShipIt Print Server running and click the Print button. Since the computer you are currently on is hooked up to the printer and is localhost it will print.
Note: It is a common misconception and can be confusing but the RocketShipIt Print Server does not need to be exposed to the internet (although it can) in order to be effective using this method. The actual label is generated server side and already downloaded to the page which you just navigated to. The form posts to http://localhost:8080 which routes directly to the computer you are currently on. This is how the label can be sent to your printer even though the printer and the RocketShipIt Print Server are never actually exposed to the internet.
Once you have this working, you may want to automate this further. For example you can use JavaScript to automatically open a window and click this print button for you. You may want to send the label directly via cURL or some other means. As long as it is sent via HTTP and the name of the param is label it will print.
Sending Multiple Labels at Once
You can also send many labels in one request:
    <form method="post" action="http://localhost:8080">
        <input type="hidden" name="label[]" value="<?php echo $base64Label; ?>" />
        <input type="hidden" name="label[]" value="<?php echo $secondBase64Label; ?>" />
        <input type="submit" value="Print" />
    </form>
Or use:
    <form method="post" action="http://localhost:8080">
        <input type="hidden" name="label" value="<?php echo $base64Label; ?>" />
        <input type="hidden" name="label" value="<?php echo $secondBase64Label; ?>" />
        <input type="submit" value="Print" />
    </form>
POST Parameters
| Parameter | Description |
|---|---|
| label | The base64 encoded ZPL,EPL,PNG,JPG or GIF label you wish to print |
| label[] | Send multiple base64 encoded labels in one request |
| redirect_url | (optional) URL to redirect to after POST |
| printer | (optional) override default printer specified in config for this request |
| label_width | (optional) Default: 4.0, value in inches, used for automatic resizing, centering, and more |
| label_height | (optional) Default: 6.0, value in inches, used for automatic resizing, centering, and more |
| dpi | (optional) Default: 200, used for automatic resizing, centering, and more |
| starting_point_x | (optional) Default: 0, starting point for x axis |
| starting_point_y | (optional) Default: 0, starting point for y axis |
| auto_crop | (optional) Default: '', if set will auto crop whitespace around image labels |
More Configuration
The configuration of the RocketShipIt print server is done by editing the config.json file that comes with the server. You can also edit the config through the web interface.
The default config is:
{
    "host": "localhost",
    "port": "8080",
    "printer": "my_printer9000",
    "open_browser": true
}
Options
| Parameter | Description |
|---|---|
| host | The host/ip you want RocketShipIt to bind/serve from. If left blank it will try to autodetect the internal IP (192.x.x.x). |
| port | The port from which the server will run. |
| secure_port | The port from which the server will run HTTPS/SSL server. |
| printer | The name of your printer as detected/set by your OS. |
| open_browser | If set to true, will open to the server welcome page in your default web browser. |
| use_ssl | Set to true if you want to serve via self-signed SSL certificate. |
| username | If set a simple user/pass will be required to configure the print server |
| password | If set a simple user/pass will be required to configure the print server |
HeartBeat Options
The RocketShipIt Print Server comes with the ability to periodically send data back to a url of your choice. We call this a heart beat. This can be useful if you are in an environment with multiple printers and want to determine which printers are currently online/active.
Example heartbeat config:
    {
        "heart_beat_url": "http://192.168.1.80:8080/yourheartbeat/reciever",
        "heart_beat_interval": 30,
        "heart_beat_params": {
            "client_version": "1.0.0",
            "function": "tags",
            "name": "Workstation 1"
        }
    }
| Parameter | Description |
|---|---|
| heart_beat_url | The url you want the RocketShipIt Print Server to send periodic data to. |
| heart_beat_interval | Interval in seconds to send data |
| heart_beat_params | Any valid json. This is user defined data. This value can be set to any valid JSON. This data will be returned to the heart_beat_url along with the standard heart beat data. |
Example heartbeat POST request:
    {
      "printer": {
        "printer": "my_printer9000",
        "available_printers": [
          "Zebra_Technologies_ZTC_ZP_450_200dpi"
        ],
        "port": "8080",
        "online": "1",
        "ip": "localhost",
        "ips": [
          "192.168.0.171",
          "100.119.11.71",
          "172.17.0.1"
        ],
        "version": "0.2.86",
        "params": {
          "client_version": "1.0.0",
          "function": "tags",
          "name": "Workstation 1"
        }
      }
    }
If the heart_beat_url is not set, the server will not attempt to send a "heart beat".
Send labels through HeartBeat
Any time you receive a heart beat from the RocketShipIt Print server you can optionally reply with one or more labels to be printed. This essentially allows the print server to pull labels periodically in addition to the normal label pushing through HTTP POST requests.
Example reply:
{"labels": ["label1base64EncodedString...", "label2base64EncodedString..."]}
Tip: You can use RequestBin to easily test and view heart beats.
Note: The config.json file must be valid json or the RocketShipIt Print Server will fail to start.
Print Queues
In addition to being able to print through HTTP POST and heart beat
replies, the RocketShipIt Print Server can also pull print jobs from
supported queue systems.
You can send just a base64 encoded label or JSON containing the label:
{
    "label": "abcd...",
    "printer": "my_printer9000"
}
The RocketShipIt Print Server currently supports the following queue systems:
Coming soon:
- IronMQ
- Celery
- ZeroMQ
Here is an example config snippit for the Amazon SQS queue:
{
    "queues": [{
        "type": "sqs",
        "region": "us-west-2",
        "url": "https://sqs.us-west-2.amazonaws.com/123/your-queue",
        "key": "YOUR_AWS_KEY",
        "secret": "YOUR_AWS_SECRET"
    }]
}
In this example the RocketShipIt Print Server will connect to your Amazon SQS queue and automatically print any valid base64 encoded labels it receives.
All keys named secret will automatically be encrypted in the config.json on startup.
Here is an example config snippit for Beanstalkd:
{
    "queues": [{
        "type": "beanstalkd",
        "endpoint": "127.0.0.1:11300",
        "tube": "labels" // optional
    }]
}
Print Server Endpoints
| Path | Description |
|---|---|
GET /printers | JSON list of detected printers |
GET /shutdown | Shutdown the server |
GET /info | Returns current version of print server and other info |
POST /packlist | Prints a JSON specificed pack list |
Sending GIF/Jpeg/PNG images to Thermal Printer
You can also send GIF/Jpeg/PNG images. The RocketShipIt Print Server will automatically detect if the label you are sending is a GIF, Jpeg, or PNG image and make the necessary adjustments to send the label to the thermal printer in native ZPL/EPL code. Please note that it is always better to send ZPL/EPL labels to the thermal printer wherever possible as the quality is better.
Since Zebra/Eltron thermal printers are not meant to print graphic images these labels are slow to start printing and quality can be degraded.
Currently the print server rotates and resizes to 4x6 label stock by default.
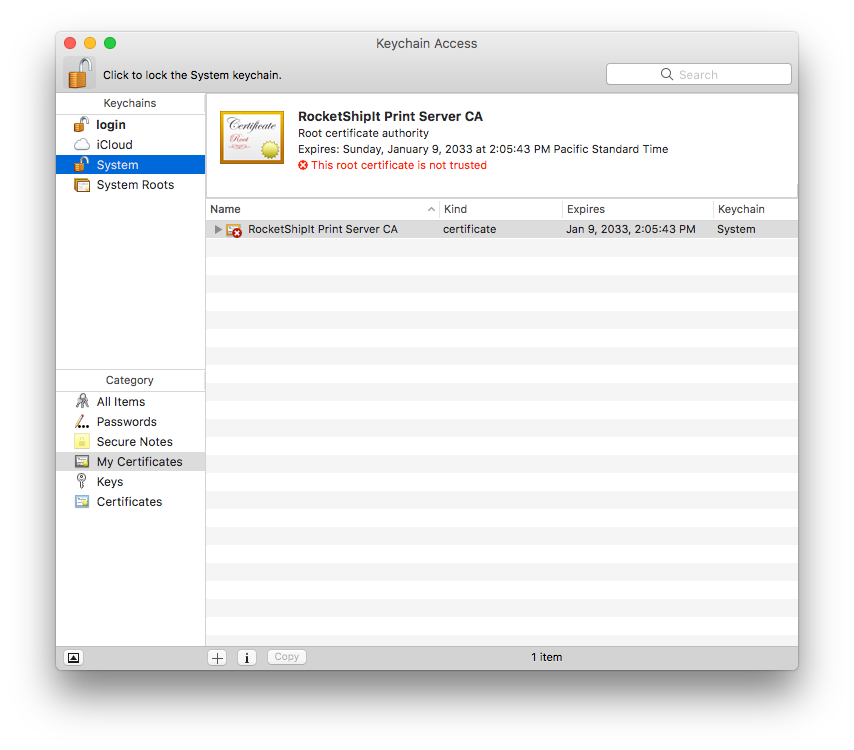
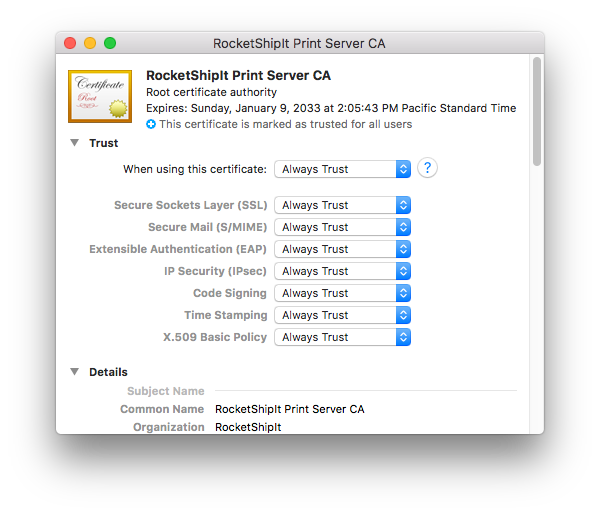
Permanently Trust Self-signed Cert (macOS)
Start by downloading a self-signed root cert Self-signed root certificate <Certificates.p12>
- Open Keychain Access
- File -> Import Items...
- Add Certificates.p12 password is RocketShipIt
- Make it trusted
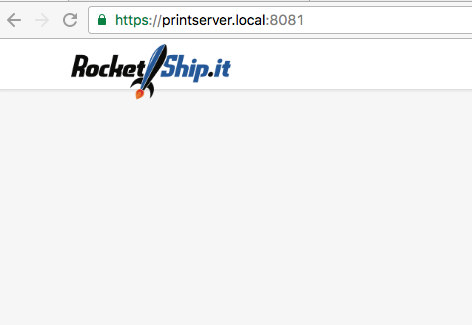
- Add 127.0.0.1 printserver.local to your /etc/hosts file.
Printing a ZPL Thermal Pack List
You can send a specified JSON POST request to /packlist to
generate and print a ZPL thermal packlist:
    {
      "printer": "name of printer to override printer in config", // optional
      "order_number": "1000002",
      "date": "08/07/2015",
      "user": "support@rocketship.it",
      "ship_date": "08/12/2015",
      "shipping_cost": 10.88,
      "tax": 5.00,
      "discounts": 10.00,
      "shipper_address": {
        "name": "RocketShipIt",
        "addr1": "101 E Ave",
        "addr2": "#100",
        "city": "San Francisco",
        "state": "CA",
        "postcode": "94115"

      },
      "to_address": {
        "name": "John Doe",
        "addr1": "123 Main St",
        "addr2": "#14",
        "city": "San Francisco",
        "state": "CA",
        "postcode": "94115"
      },
      "items": [
        {
           "sku": "ups",
           "desc": "RocketShipIt for UPS Shippers",
          "price": 289,
          "qty": 1
        }
      ],
      "custom_fields": [
        {
          "key": "my field",
          "value": "foo"
        },
         {
          "key": "my field 2",
          "value": "bar"
        },
        {
          "key": "my field 3",
          "value": "another custom"
        }
      ]
    }
Response:
This end point will return status OK on success or status Error on error:
    {
        "Status": "OK",
        "Message": ""
    }
Windows Specific Considerations
Windows 7
You can increase print speed if you uncheck Enable Bidirectional Communication under the printer properties -> Ports section.
Ubuntu Specific Considerations
If you do not have lpr installed, install via sudo apt-get install cups-bsd and use sudo apt-get remove lpr. The Gnu version of lpr doesn't contain the -o option flag and will result with an error in your RocketShipIt Print Server log.log file.
Raspberry Pi Specific Considerations
There are two versions of CUPS. The RocketShipIt Print Server requires the cups-bsd package. You can install with the following commnad:
sudo apt-get install cups cups-server-common cups-bsd
Blurry Labels
If you are experiencing blurry labels, you are probably sending large PNG/GIF/PDF images to the thermal printer. Thermal printers do not understand these formats and requires them to be converted to ZPL/EPL code. The RocketShipIt Print Server can do this for you but it involves conversions, resiszing, grayscaling images, etc. and may not work perfectly. I you are printing to a thermal printer we highly recommend using ZPL/EPL directly.